Branding
Bring your company's logo and brand colors into the surfaces your clients and team members actually see — invoice PDFs, client emails, the public Client Form, and team notifications.
Where Branding Shows Up
There are four branded surfaces you can turn on or off independently:
-
Team email branding — appraisal assignments, daily agendas, order received notifications, and unread-message digests
-
Contact email branding — invoice emails and client/contact-message emails (the ones your clients receive)
-
Client form branding — your public order form at
secure.appraiserinbox.com/orders/awesome-appraisers(example) -
Invoice branding — your logo on invoice PDFs (the body of the invoice stays black & white for readability)
Quick Setup From Your Website
If your company has a website saved in Organization settings, the fastest path is to let Appraisal Inbox read it for you.
-
Navigate to Settings > Branding
-
Click the "Try It" button in the top banner

-
Wait a few seconds while we read your site, identify the most likely logo, and pull your brand colors
If it works, your logo and colors are applied immediately and you can fine-tune anything below.
Uploading or Importing a Logo
If the auto-detect didn't find your logo or you'd rather upload it directly: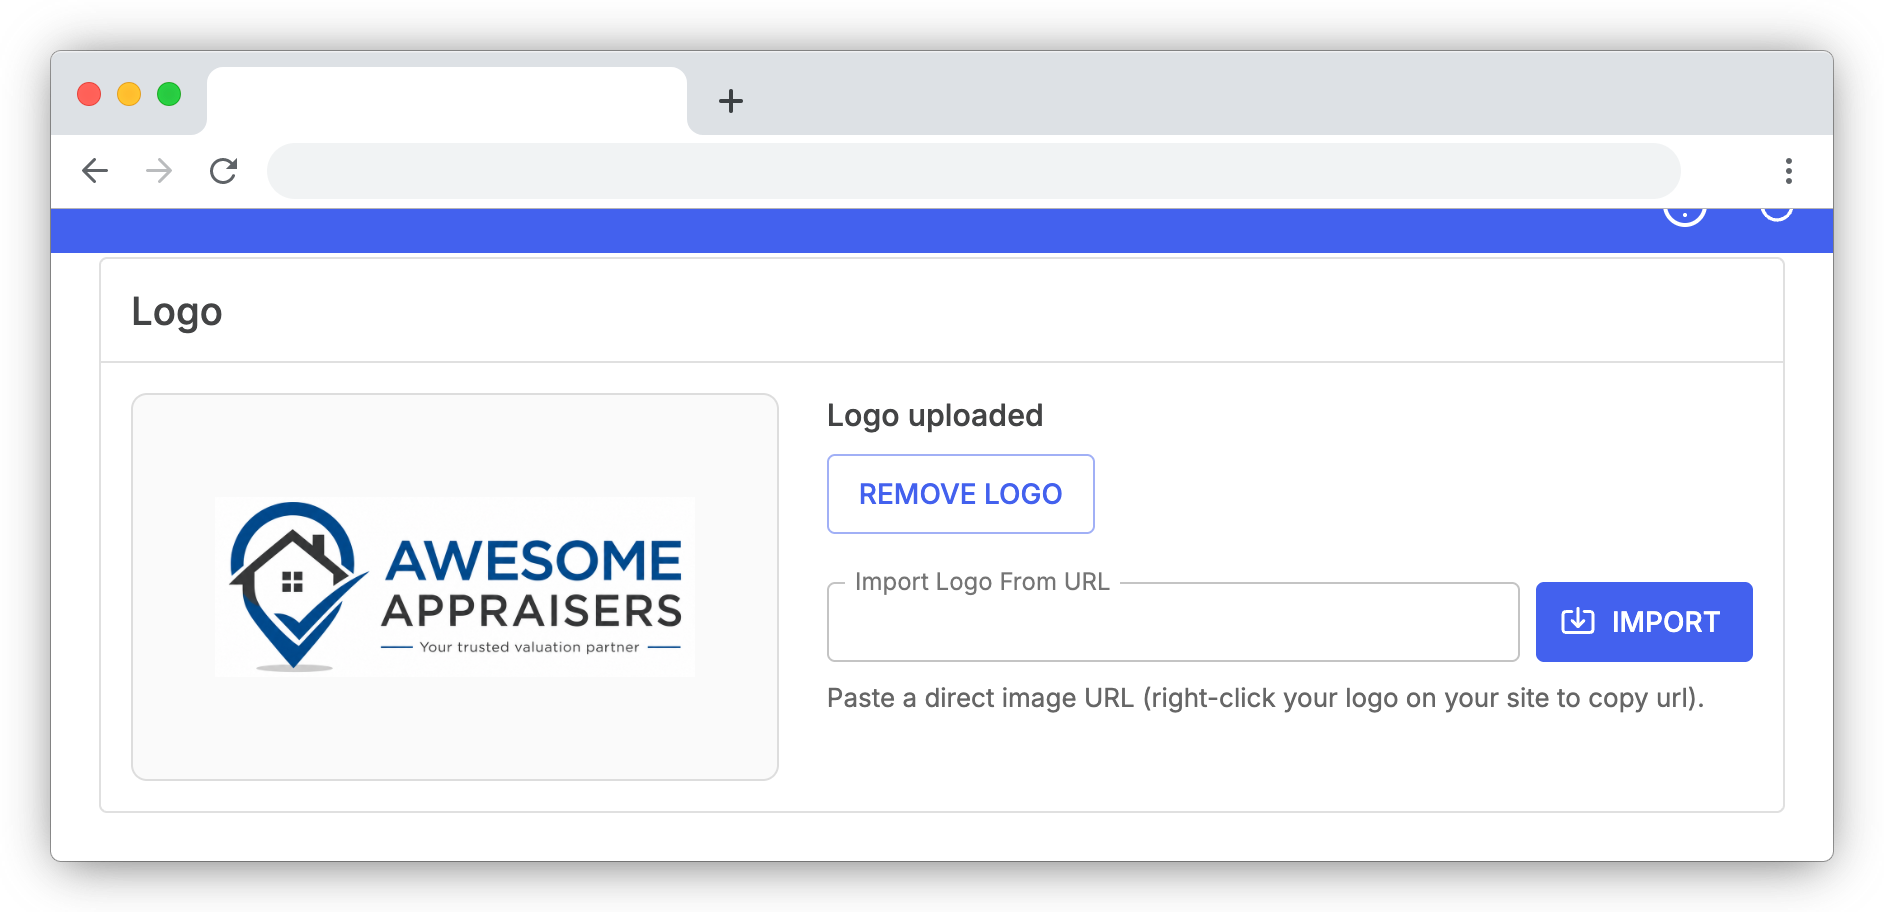
Upload from your computer
-
Click Upload Logo
-
Pick a file — PNG, JPG, SVG, WebP, GIF, BMP, or TIFF up to 10 MB
Import from a URL
If your logo lives on your website, you can pull it in directly:
-
Right-click your logo on your company website and choose Copy Image Address
-
Paste the URL into the Import Logo From URL field
-
Click Import
Replacing or removing
Once a logo is up, Upload Logo becomes Remove Logo. Remove first, then upload again to swap.
Setting Brand Colors
Auto-detect colors from your logo
If you've uploaded a logo and haven't set either color yet, an Auto-detect colors from logo link appears under the swatches. Click it and we'll analyze the image and suggest a primary/accent pair — useful when you don't have a website to scrape from, or when website auto-detect didn't pull a clear palette.
Set your brand colors manually
If your brand colors were not automatically detected or are incorrect, pick a Primary Color and an Accent Color that match your brand. These are used for buttons, links, headers, and accents on branded surfaces: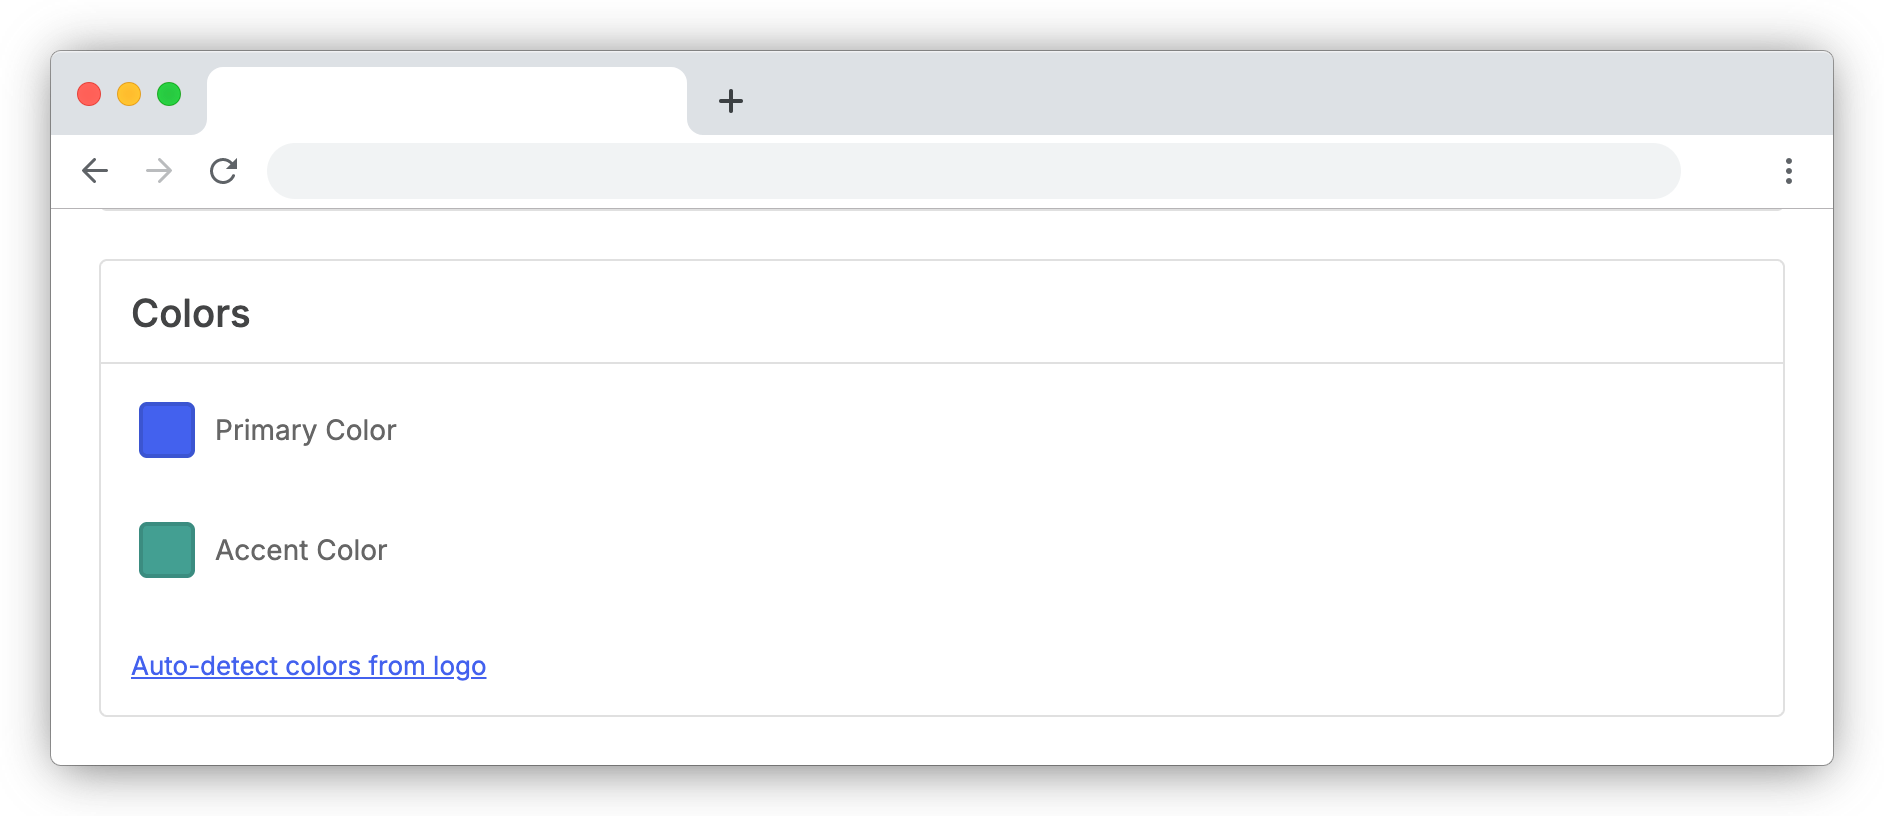
-
Click the color swatch next to Primary Color or Accent Color
-
Pick from the palette or type a custom hex code into the field at the bottom of the picker
-
The color saves automatically as soon as you pick it
Choosing Which Surfaces Get Branded
Each branded surface has its own toggle, so you can roll branding out gradually or keep certain emails on the platform default.
Showing Your Company Contact Details
Toggle which contact details from Organization settings — address, phone number, and website URL — appear on branded surfaces.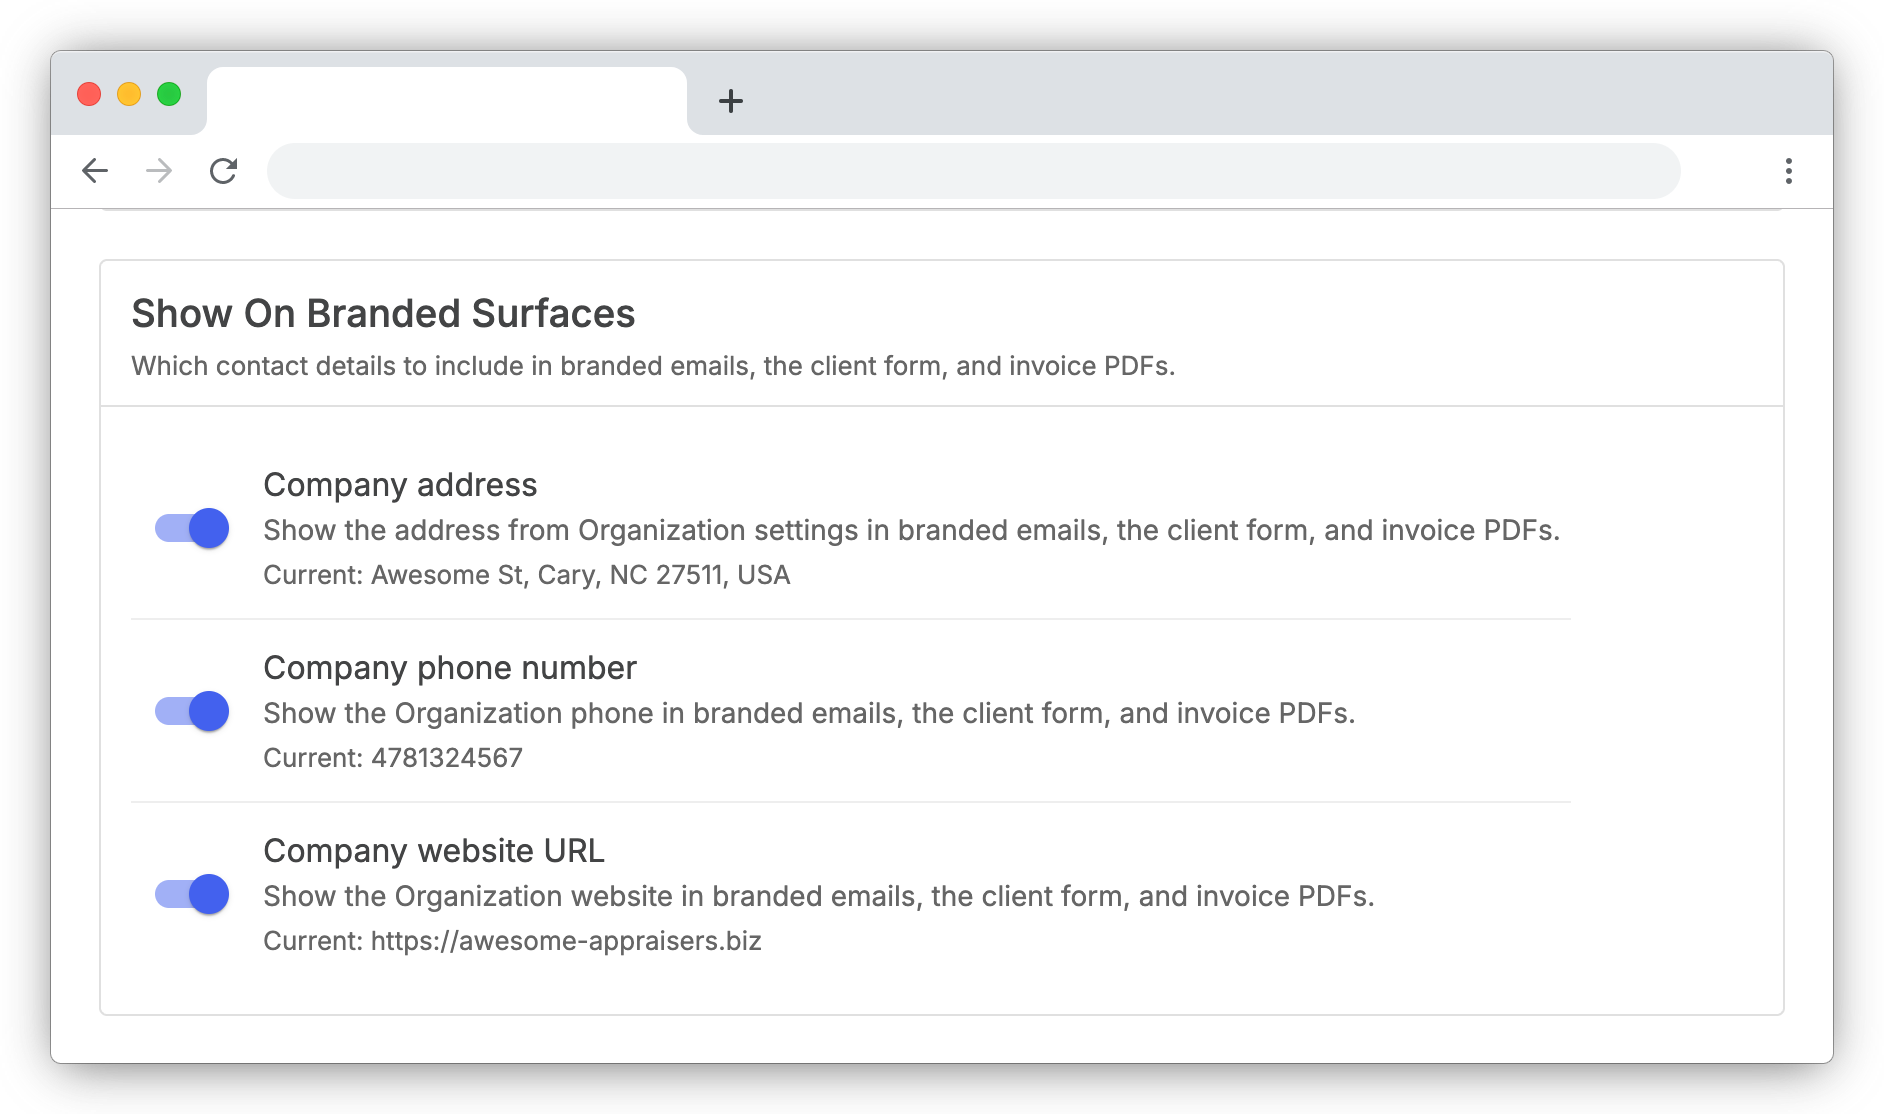
Each toggle shows the saved value beneath it. If a field is empty in Organization settings, the toggle is disabled until you fill it in.
Previewing Your Branding
The Preview card lets you see exactly what your clients and team will see before going live.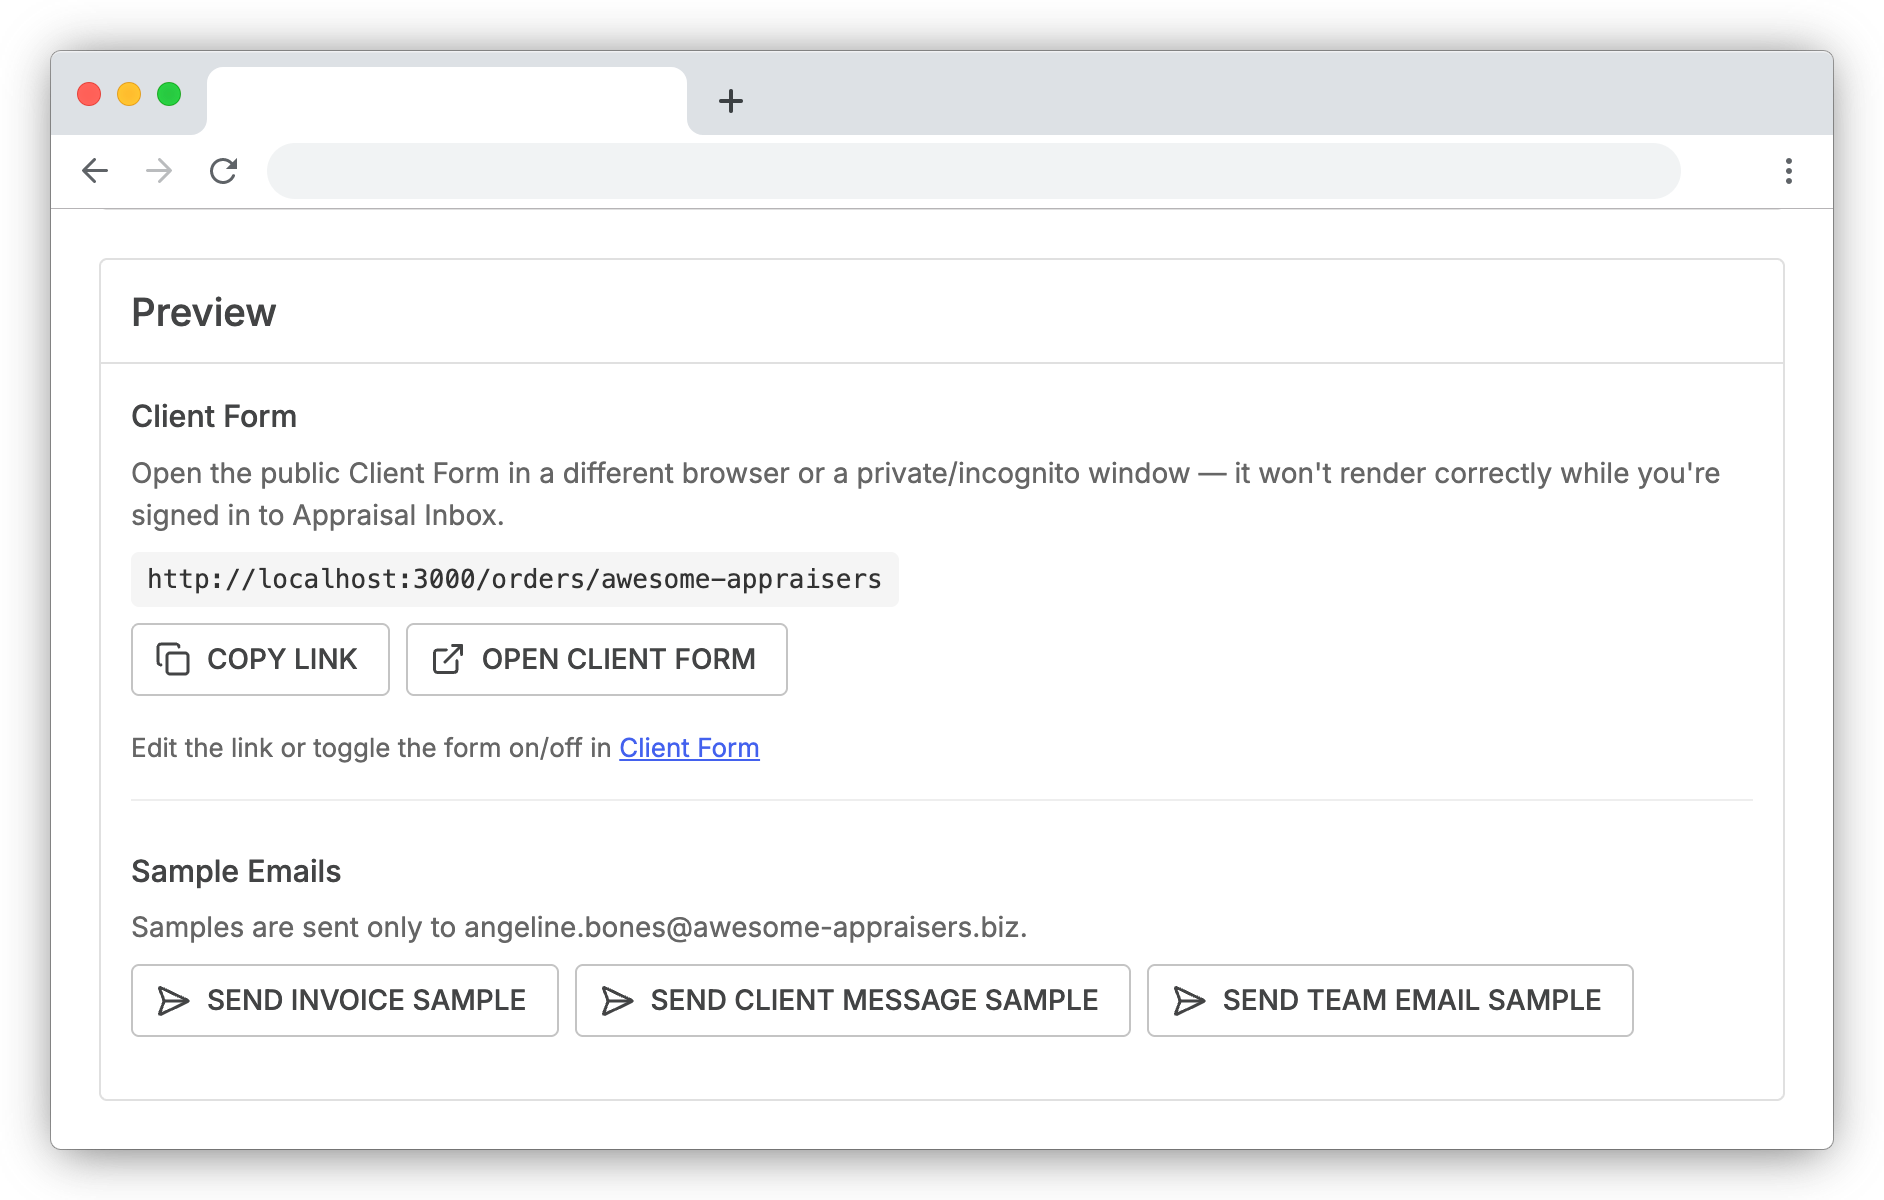
Public Client Form
If you've configured a Client Form link in Client Form settings, the public URL is shown here for easy sharing:
-
Click Copy Link to copy the URL to your clipboard
-
Click Open Client Form to view it in a new tab
If no link is set up yet, the Preview card points you over to Client Form settings to create one.
Sample emails
Send yourself a sample of any branded email to see it in your real inbox:
-
Send Invoice Sample — branded invoice email, with the invoice PDF attached when generation succeeds
-
Send Client Message Sample — what your clients see when you message them
-
Send Team Email Sample — what your team sees for an appraisal assignment
Samples are sent only to your email address on your user account
Notes & Tips
-
Who can edit branding — only Account Owner and Full Access team members can manage these settings.
-
Samples reflect the latest — every preview is built from your current logo, colors, and toggles, so what you send yourself is what your client or team member will see.
-
Invoice PDF design — your logo appears top-right in full color; the invoice body stays black & white so line items, totals, and payment instructions read cleanly when printed.
-
Auto-detect doesn't always succeed — if your site is heavily scripted, behind login, or hosts the logo on a CDN our system might not be able to read it but you can still manually upload your logo and set branding.
-
Logo dimensions can't be read — rarely, an uploaded file passes all checks but we can't determine its dimensions. The Logo card warns you, and client-facing surfaces show your company name in place of the logo until you upload a different file